
Home Copy
Small Space, Big Impact: Design Hacks for Creating a Stylish Urban Deck
Ready to transform your limited urban space into a stylish oasis with a thoughtfully designed deck? This guide will equip you with design hacks and expert tips to maximize your outdoor experience, even in the smallest backyard.
Unlocking Space in Your Urban Deck Design
First, let’s explore some space-saving layouts and features that can help maximize your square footage.
-
- Deck Shapes: Avoid complex shapes that can fragment the area and make it feel smaller. Stick to simple square or rectangular configurations that efficiently utilize your available space. Or, choose an L-shaped design that offers additional deck space with distinct zones, like a grilling station separated from your living and dining space.
- Second-Story Decks: Explore the possibility of a second-story deck to maximize outdoor space. This is a great way to gain square-footage and create a private haven above the hustle and bustle of the city. Below, you can retain your yard or garden—or add a cozy patio.
- Stair Placement: Tuck your stairs along the side or in a corner of the deck. This frees up valuable deck space for furniture or activities that would otherwise become just a space-eating walkway.
- Railings: Avoid railings with thick posts and balusters. Opt for slim railings or those that provide a feeling of openness, like cables, metal mesh, or glass.
- Multi-Purpose Built-ins: Planters and pergolas serve triple duty, allowing you to add greenery, privacy, and shade. By carefully integrating them, you can also save space while creating an interesting, cohesive design.
- Under-deck Storage: Benches with storage can help wrangle clutter on your small deck, but plan to take advantage of hidden under-deck storage to stash even more items out of sight.
Modern Material Pairings for Urban Decks
When it comes to decking materials, consider options that create a modern feel and complement your urban environment. Here are some decking-and-railing pairings to spark your imagination:
Stained Wood
Stained wood may sound traditional, but there are plenty of ways to achieve a new twist on this classic for your city deck.
- Dark and Bold: Consider wood decking with a charcoal or smoky gray stain for a contemporary feel—and the added advantage of hiding dirt. Pair this with sleek metal railings for a bold urban look.
- Light and Breezy: For an airy feel, consider stain colors like light gray, driftwood, and taupe to reflect light and make your small deck feel larger. Complement these with glass railings for a minimalist look that maximizes your view.
- Colors with Personality: Your deck can be a great canvas for modern tones. Deep teals, refreshing blues, and sunny golds all make unique statements. Complement these stain colors with bright aluminum railings or artistic custom panels with a modern flair.
Composite & PVC Decking
Both composite and PVC decking offer a modern aesthetic in a low-maintenance package. Consider these stylish options for your urban deck:
- Wood-Grains: These manufactured boards mimic the look of real wood. Choose a straight grain pattern for a clean and contemporary aesthetic, and check out newer offerings designed with the look of interior hardwoods for seamless transitions from the indoors to the outside. Complement your choice with horizontal cable railings for a clean look and clear views.
- Solid Colors: Solid color composite or PVC deck boards come in a variety of hues. Consider a deep navy, a Caribbean blue, or a bright citrus shade to spice up your deck. Solid colors make a statement and pair well with minimal décor. Sleek black metal railings with a matte finish offer a pleasing contrast to their richness, perfect for a unique, sophisticated vibe.
Decking Layouts to Maximize Visual Space
The orientation of your decking boards can significantly impact the overall look and feel of your deck. While traditional parallel installation is the most common, alternative orientations can create the illusion of more space for your small deck.
- Diagonal Decking: This is a classic trick for making a small space feel larger. Running the deck boards diagonally draws the eye across the deck, creating a sense of expansiveness.
- Perpendicular Decking: For attached decks, orienting the boards perpendicular to the home can visually extend the feeling of the deck space outward from the house. This works best on rectangular decks, where the long side runs parallel to the house.
These installations are more complex than parallel layouts, so factor in additional labor costs if you’re hiring out. Alternative orientations can also affect weight-bearing capacity, so be sure to call in a professional to assess the specific requirements of your design as needed, and always adhere to local building codes.
Fast & Easy Deck Installation with CAMO
Now that you’re inspired to transform your urban space with a stylish new deck, it’s time to consider efficient building solutions. CAMO offers a variety of products and tools designed to streamline your installation process.
- CAMO MARKSMAN Pro Tools: These tools are specifically designed for edge-fastening deck boards with CAMO Edge deck screws, creating a beautiful fastener-free surface. They work with a variety of deck materials, including pressure treated lumber, cedar, redwood, hardwood, composites, and PVC decking.
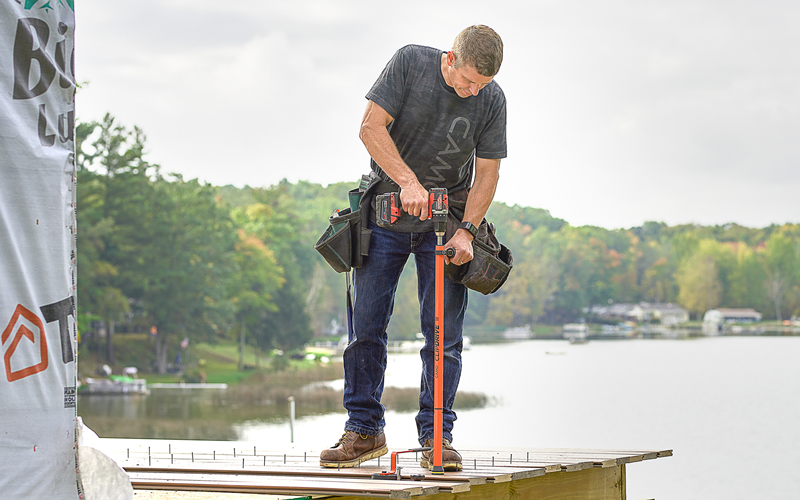
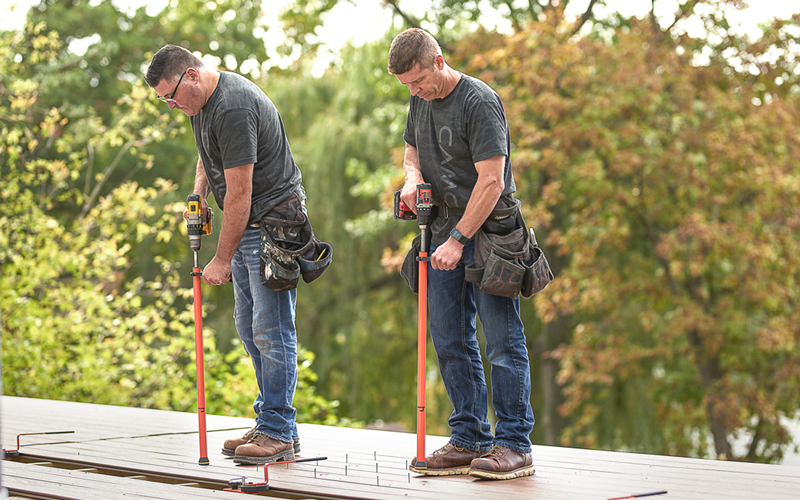
- CAMO DRIVE Tools: Just attach the DRIVE or ClipDRIVE tool to your drill and comfortably install your decking twice as fast.
- CAMO WEDGECLIP: These pre-assembled deck clips eliminate the need for pre-drilling and ensure consistent spacing between your deck boards. WEDGECLIP’s are designed for grooved wood, composite, and PVC deck board installations in any deck pattern on your wood joists.
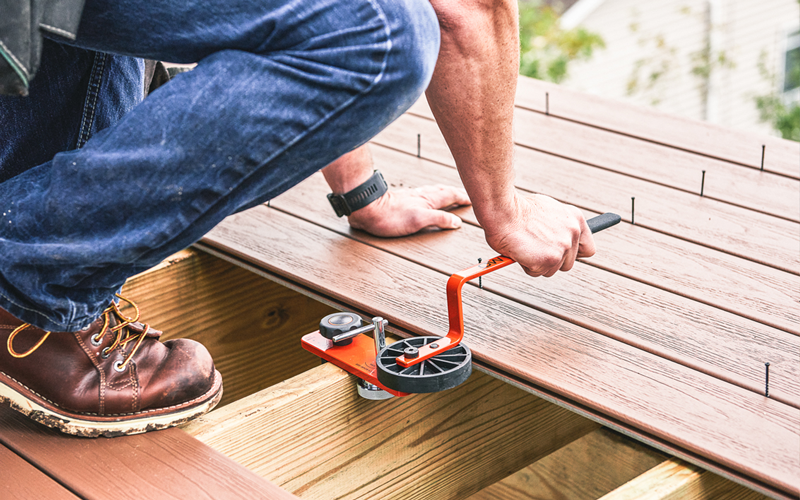
- CAMO LEVER: This helpful tool straightens warped boards and secures them for fastening, replacing the need for extra hands and making your urban deck an achievable DIY project you can tackle yourself.
- DECK IN A BOX: This convenient kit includes everything you need to install 500 square feet of grooved composite decking, offering flexibility for larger projects—or perfect for partnering up with your favorite neighbor on twin decks. It includes board benders, hidden deck clips, and a stand-up tool for clip fastening–perfect for taking on your urban deck with ease.
With careful planning and attention to detail, your urban oasis is well within reach. By leveraging CAMO’s innovative deck tools and clips, you can efficiently build a modern deck that makes a big impact in your small space. Enjoy your chic retreat as you relax, entertain, and create backyard memories in the heart of the city.
Deck Fastening System Comparison
CAMO has systems to help you build a better deck—but what’s the best one for your job?
You’re a hard worker, but that doesn’t mean you’d choose to work harder than you have to. Instead, you’re likely to pick up fasteners and tools to help you get the job done quickly so you can tackle even more projects.
At CAMO, we recognize your work ethic and have created innovative deck fastening systems to make your work even smarter, faster, easier, and better. But which deck fastening system is the best for you? Let’s compare CAMO’s ClipDRIVE®, DRIVE, and MARKSMAN Systems to see which suits your job.
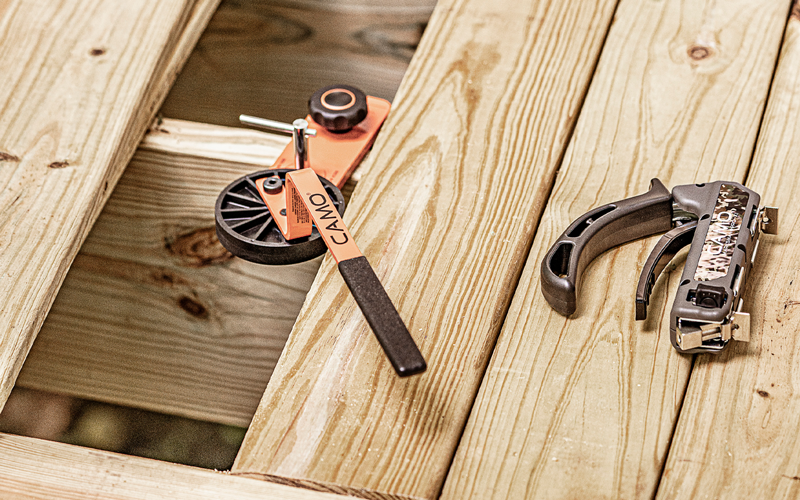
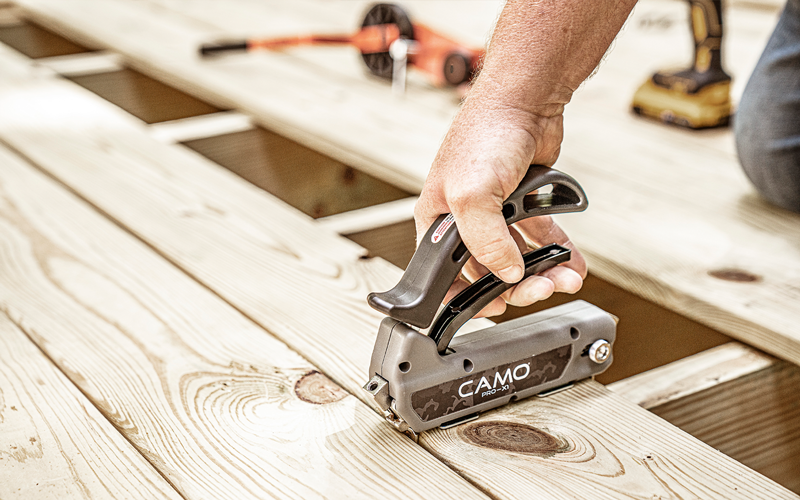
CAMO ClipDRIVE™ STAND-UP DECK CLIP FASTENING SYSTEM
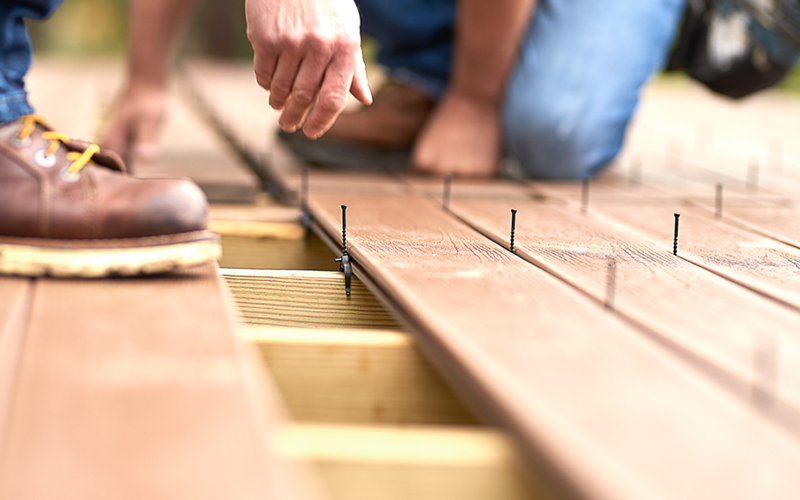
Set Rows of Clips
Lock boards in place with Lever
Fasten Clips with ClipDRIVE
If installing grooved decking is your forte, the CAMO ClipDRIVE stand-up deck clip fastening system is a must-have to maximize productivity. The system includes CAMO Universal Deck Clips that work with any grooved deck board and the one-of-a-kind ClipDRIVE tool.
CAMO Universal Deck Clips are available in EDGE® Clips for 90° deck patterns, EDGEX® Clips for any deck pattern, and EDGEXMETAL® Clips for installations on steel framing. They are one-pass fasteners, which means you place them on the joist or in the board’s groove and they stay put without partial installation. That way, you can set multiple rows of boards, lock them in place with the CAMO LEVER® tool, and fasten a field at one time—a significant time-savings.
While you can fasten clips with the included NEVER-MISS™ Guide, you can speed up your installation even more by using the ClipDRIVE, which was exclusively designed for CAMO Universal Deck Clips. This innovative tool is simple to assemble, attaches to your drill, and is the perfect fit for your whole crew thanks to its height-adjustable handle. With its lightweight design and weighted nose, you can easily swing the ClipDRIVE from joist to joist, quickly targeting screw heads, while the no-mar nose protects the board from rings or scuffs. ClipDRIVE also reduces arm fatigue since there’s a short distance to compress the drill while fastening. Long story short, if you want to have the best experience fastening grooved decking, ClipDRIVE is the answer.
CAMO DRIVE™ STAND-UP 3-IN-1 FASTENING SYSTEM
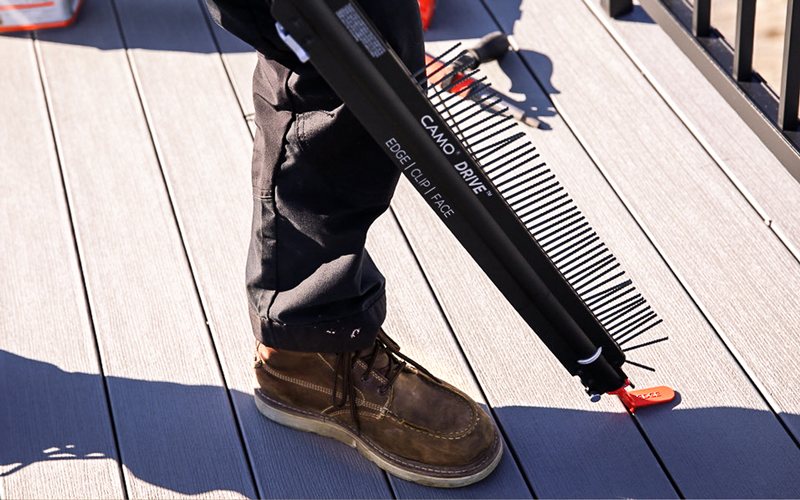
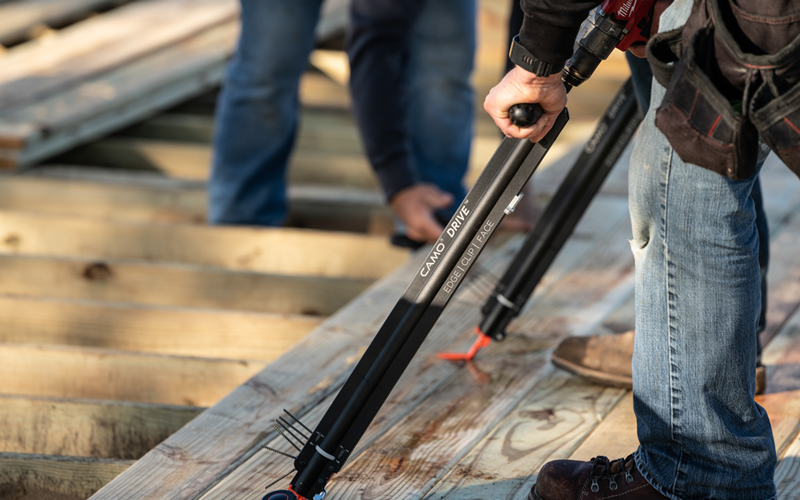
edge fasten with drive
Face fasten with DRIVE
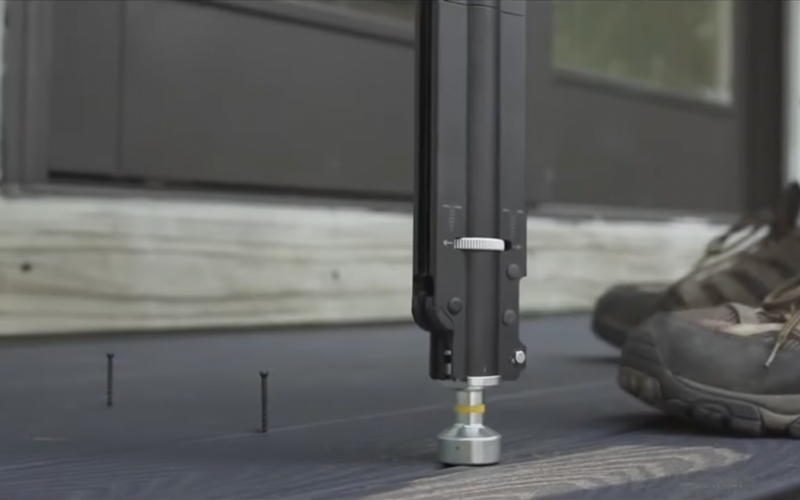
Fasten clips with Drive
If your crew takes on various decking projects, the award-winning DRIVE stand-up 3-in-1 fastening system is right for you. This affordable system delivers reliable speed and comfort on the job as you install better-performing CAMO Collated Edge Screws, Collated Face Screws, or CAMO Universal Deck Clips in no time.
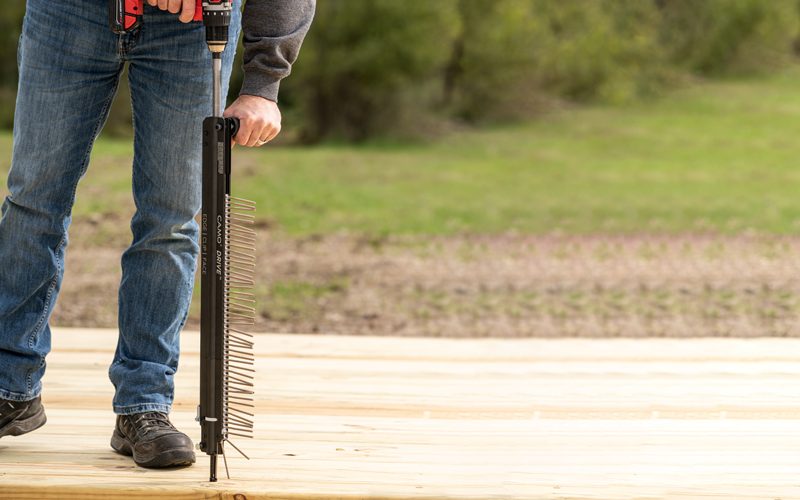
DRIVE is easy to set up: install the bit and nose piece for the type of fastener you’re using, attach your drill, and load the screws in the tool or place the clips in the boards. Then, you’re ready to quickly secure the boards with CAMO’s premium fasteners.
To achieve a fastener-free surface on pressure treated, cedar, redwood, uncapped composite, and PVC deck boards that won’t crack or splinter, use DRIVE with CAMO Collated Edge Screws driven into the edge of the board. If you prefer a face-fastened deck, secure boards with the innovative Collated Face Screws that are available in two varieties for pressure treated and composite decking. The pressure treated screws feature a rake tip to auger wood out of the board to reduce splitting and cracking, while the composite screws have a fast-starting slash point to eliminate board mushrooming. For any screw install, keep in mind that the DRIVE tool leaves no spacing between boards, so you may need secondary spacers to follow the board manufacturer’s guidelines. Finally, if you’re installing grooved decking, use DRIVE to speed up fastening CAMO Universal Deck Clips. That’s a triple-threat tool worthy of placement in any tool crib.
CAMO MARKSMAN HIDDEN EDGE SCREW FASTENING SYSTEM
bend & lock boards with Lever
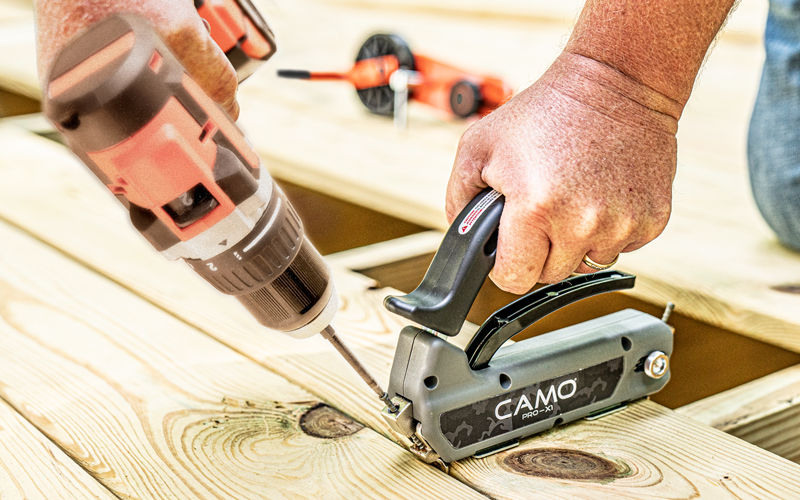
place marksman tool
drive edge screws through the guides
For a craftsman’s experience installing decking that can still be completed in a few hours, pick up the CAMO MARKSMAN Hidden Edge Screw Fastening System. This hand-driven system of MARKSMAN tools and Edge screws is an economical and perfect way to achieve a fastener-free surface that won’t split, crack, or splinter on any square deck board.
The heavy-duty MARKSMAN tools clamp to the deck board and create spacing between boards. They feature screw channels that direct the Edge screws into the board’s edge, creating a strong v-lock connection into the joist while leaving a hidden fastener finish. The best part? There’s no pre-drilling required for pressure treated, cedar, redwood, PVC, and uncapped composite boards as the Edge screw scrapes and penetrates the board with light pressure. However, given the density of capped composites and hardwoods, we recommend pre-drilling these boards, which is as easy as running the pre-drill bit through the screw channel before dropping in the Edge screws.
There’s a MARKSMAN Tool to fit and space any board. The MARKSMAN Pro® is for composite, PVC, capped composite, cedar, redwood, hardwood, and KDAT deck boards that require 3/16 in. spacing. Use the MARKSMAN Pro®-X1 to achieve 1/16 in. spacing with pressure treated deck boards. The MARKSMAN Pro®-NB creates 3/16 in. spacing for narrow composite, PVC, capped composite, cedar, redwood, hardwood, and KDAT deck boards. Finally, the MARKSMAN Edge single-shot tool attaches to your drill and leaves no space between pressure treated deck boards.
To sum it up, the MARKSMAN System has an affordable price point, is easy to use, creates strong connections, and results in a beautiful fastener-free and long-lasting surface, great for any deck builder.
So when it comes to picking the right system for your crew, it all comes down to function. But no matter what CAMO deck fastening system you choose, you’ll experience huge time-savings and excellent performance, which is why it’s the better way to build a deck.
Privacy Policy
Easy End of Summer Deck Maintenance
Keep your deck looking its best, and get it ready for next summer by following a few simple deck maintenance steps.
Summer is wrapping up, and winter is right around the corner, whether you like it or not. We all know that after months of cold ahead, that spring fever will set in, and nothing will be better than enjoying the fresh air on your deck.
However, many homeowners have to dedicate weekends in early spring to prepare their decks for the season—especially those with pressure treated decks that need to be cleaned and stained. If you want to skip right to enjoying your deck when the weather turns, there’s no better way to save time than to give your deck some TLC this fall by following these simple steps.
Thoroughly Clean Your Deck
By the end of summer, your deck has probably seen a fair share of meals, parties, and life in general, which means spills of food, drinks, and sunscreen. A great first deck maintenance step is to clean your deck.
Start by moving your furniture off the deck and sweeping your boards or using a leaf blower to remove any debris on the deck top, paying special attention to the gaps between boards where dirt can accumulate. After sweeping, lightly power-wash or scrub the boards with warm water and mild deck cleaning solution. For wood decks, you can use a harder bristle broom to get into the wood grain, but for composite boards, stick with a soft-bristled broom to do the job and prevent scratches. No matter your boards, always remember to sweep with the grain to reduce the potential for damage.
Inspect and Repair
After a good clean, you can examine the deck for any repairs you may need to make. If you see something wrong with a board now, colder temperatures and wet weather certainly won’t make it better by spring. Double-check the fasteners to see if there are any loose ones, check the security of the deck railings and the stairs, and even take a peek below the deck to evaluate the joists for any signs of rot.
If you have a wood deck, give your deck a barefoot walk-over to see if any spots may need to be sanded to prevent future splinters and slivers. Now is also an excellent time to check for any chips in the paint or stain and ensure any exposed wood is sealed and protected from wintry elements.
Get Your Deck Ready for Winter
If you plan on hanging out on your deck long into the fall, that’s great—just be sure to regularly sweep off leaves and debris so they don’t accumulate. Then, when it’s time to head inside for the winter, properly winterize your deck by covering your furniture or, ideally, storing it inside. If you notice some wear and tear on your furniture, like rust forming on chair legs, take the time now to clean, sand, and repaint them so they are set and ready come spring. Your future self will thank you.
Maintaining Your Deck Through Winter
If you live in an area that experiences heavy snowfall, be sure to clear the snow off of your deck promptly. Not only does snow add lots of moisture to your boards, but it can also put significant weight on your deck. Lighten the load by shoveling the top few layers of snow— don’t shovel your boards directly —then use a soft-bristled push broom to clear the rest of the snow from your boards if desired.
Deck maintenance doesn’t have to be a monumental chore. Following these simple steps will keep your deck in great shape and maximize your time to enjoy your outdoor living space.